Search This Blog

Thursday, April 14, 2022

Extract Table Data Using Python

This is a very simple example. But you will know the dynamics to alter for achieving the right results. 

from time import sleep
from selenium import webdriver
from selenium.webdriver.common.keys import Keys
from selenium.webdriver.common.by import By
from selenium.webdriver.chrome.options import Options
options = Options()
options.headless = True
driver = webdriver.Chrome(options=options)
driver.maximize_window()
driver.get('https://www.w3schools.com/html/html_tables.asp')

# Make Python sleep for some time
sleep(2)

rows = len(driver.find_elements("xpath","/html/body/div[7]/div[1]/div[1]/div[3]/div/table/tbody/tr"))

# Obtain the number of columns in table
cols = len(driver.find_elements("xpath","/html/body/div[7]/div[1]/div[1]/div[3]/div/table/tbody/tr/td"))

# Printing the data of the table
for r in range(2, rows+1):
for p in range(1,4):
#obtaining the text from each column of the table
value = driver.find_element("xpath","/html/body/div[7]/div[1]/div[1]/div[3]/div/table/tbody/tr["+str(r)+"]/td["+str(p)+"]").text
print(value)


Friday, February 4, 2022

Execute Selenium in Jupyter Notebook - Headless Mode

In the previous example, when you run the script, you will be able to see the chrome browser getting activated and follows the command in the script. 

Headless mode runs the code without the need of the physical browser. It executes the same script behind the scenes, without opening the browser window at all. 

This makes automation much easier and efficient in a way. Speed and performance is amazing in this scenario. You can run multiple tests in parallel without the overhead of multiple browsers being open all through the execution time frame. 

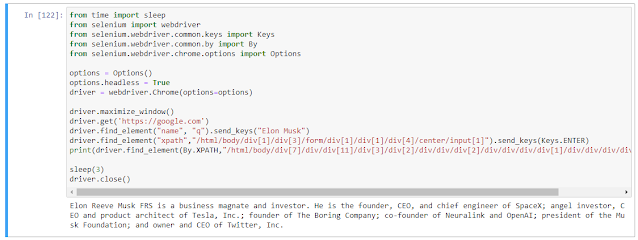
Below is what how you can run the code from the previous post in the headless mode. 

from time import sleep
from selenium import webdriver
from selenium.webdriver.common.keys import Keys
from selenium.webdriver.common.by import By
from selenium.webdriver.chrome.options import Options
options = Options()
options.headless = True
driver = webdriver.Chrome(options=options)

driver.maximize_window()
driver.get('https://google.com')
driver.find_element("name", "q").send_keys("Elon Musk")
driver.find_element("xpath","/html/body/div[1]/div[3]/form/div[1]/div[1]/div[4]/center/input[1]").send_keys(Keys.ENTER)
print(driver.find_element(By.XPATH,"/html/body/div[7]/div/div[11]/div[3]/div[2]/div/div/div[2]/div/div/div/div[1]/div/div/div/div/span[1]").text)
sleep(3)
driver.close()

Result will be the same, but no browsers are opened. 


Saturday, January 8, 2022

Execute Selenium in Jupyter Notebook

Installing and running selenium is so simple with Jupyter Notebook. Follow the below steps to create a sample program. Creating POCs will be superfast with this method. Steps to run Selenium with Python on Jupyter notebook below:

Install Selenium in Jupyter

!pip install selenium

If its successful, you will get the below message

Install Chrome Webdriver

Install from this link: https://chromedriver.chromium.org/

Make sure that you are downloading the version that matches with your chrome browser version. 

Run the sample program below

Intent of this code sample is to search for a person in Google and retreive the Wiki text displayed on the right side of the page. 

from time import sleep
from selenium import webdriver
from selenium.webdriver.common.keys import Keys
from selenium.webdriver.common.by import By

driver = webdriver.Chrome()
driver.maximize_window()  
driver.get('https://google.com')
driver.find_element("name", "q").send_keys("Elon Musk")  
driver.find_element("xpath","/html/body/div[1]/div[3]/form/div[1]/div[1]/div[4]/center/input[1]").send_keys(Keys.ENTER) 
print(driver.find_element(By.XPATH,"/html/body/div[7]/div/div[11]/div[3]/div[2]/div/div/div[2]/div/div/div/div[1]/div/div/div/div/span[1]").text)

sleep(3)
driver.close()

Run the code and you will get the below result.